

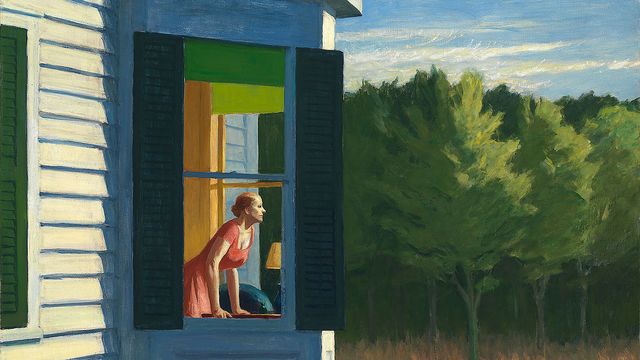


Handi-hour Crafting: Silhouette Home State Decal
Video Player is loading.
Current Time 0:00
/
Duration 0:00
Loaded: 0%
Stream Type LIVE
Remaining Time -0:00
1x
- Chapters
- descriptions off, selected
- captions and subtitles off, selected
This is a modal window.
Smithsonian American Art Museum's Public Programs Coordinator Katie Crooks demonstrates craft activities for the Renwick Gallery's Handi-Hour program currently being held at the Luce Foundation Center during the Renwick's two-year renovation.
To get started, let’s get our materials together. The first thing I have is a cutting mat so I don't damage the table that I’m working on. Because I will also be using an X-ACTO knife or a sharp razor blade. A box cutter can work in a pinch; just be very careful. I have a sharp pair of scissors, a pencil, or a thin pointed pen or marker. I like pencils because they erase nicely, a ruler or straight edge. Some pieces of vinyl.
What I have here is actually museum exhibition vinyl. This is the type of stuff that we use to put labels on the wall here at the museum. We have a lot of scraps left over, so I am upcycling these leftovers for our exhibitions department. However, if you are unable to secure exhibition quality vinyl, which may be pretty typical if you’re doing this at home, you may want to go to a hardware store and look for contact paper or shelving paper or temporary wallpaper. Anything where you can peel back the back and expose a sticky surface. You’re going to want to test this surface on wherever you’re placing your decal so that you can make sure that it’s not going to remove paint or color from wherever you want to adhere your finished artwork. The nice thing about this exhibition grade vinyl is that it will not peel back the paint. It’s actually really nice quality for this particular activity.
Most importantly you need an outline of the state or country, depending on the purpose of your decal that you want to work with, so here I have an outline of the state of Iowa. As you can see along the sides, you have the Mississippi on one side and the Missouri on the other. The rivers that form the east and west borders of Iowa create a lot of bumpiness. You can be as exact as you want when cutting this silhouette out. I tend to simplify some of the bumps on the side when I do cut it out just because it’s very hard and very tedious to get every nook and cranny of the rivers. But it’s all based on how big or small you make your silhouette. If it’s very tiny, you’re going to have to simplify it quite a bit. If you make a very large silhouette, then you could probably do a lot more detail.
I’ve already gone ahead, and I’ve cut out a couple of these just to save us a little bit of time with this demonstration. So you can see along here, if you look closely, there’s a lot of bits of the river that I did not incorporate, but I think that you can still very much get the idea of what the state looks like, and it becomes very identifiable.
Now, to get started, first you get your template. You can go online easily through a search engine and find an image, print it out, scale it to the size that you want, and then cut your piece of vinyl so that it matches size-wise. You’re going to want to flip your piece of vinyl over. Luckily, these have a grid on the back. It’s great for having some guidelines. A lot of contact paper and the shelving paper and things you can pick up at an ordinary hardware store will have these gridlines as well. It makes things easy to get started. Place that down in front of you, take your cutout silhouette, and you’re going to want to flip it so that your state is facing the wrong direction because you’re going to be tracing on the white paper side. When you cut it out, you’re going to need the reverse on the side that’s going to show through. Otherwise, you will have a backward state. I like to use pencil just in case you make a mistake, you can always erase and adjust.
You can see that the top and bottom borders of the state I tried to align to the grid to make it easy for cutting it out. From this point, you go ahead, and I would cut this out. Use your sharp scissors. If you need to, you could do this with an X-ACTO knife, but usually at this point, it’s not tight enough corners and tiny enough cuts that you really need to.
So go ahead, cut out your state, and once you get your state cut out, it’ll look something like this. From this point, you just need to figure out what you want the inside of your state to say. If you use one of the map searches online, you can go ahead and figure out, if you don’t already know, the approximate area of where your hometown would fall. I know that mine is northeast Iowa, so it’s going to be about in this section. I also went ahead online and searched for different types of fonts that I liked, and I found this nice stencil font here. This is the one that I’m basing my font on for the finished piece.
We go ahead and look at this one, you can see kind of how I got that idea. A stencil font is usually the best to work with because you’re going to be cutting it out. If you cut a full circle around, you would just have a large circle, which with some fonts looks very nice, but if you wanted to have the inside filled in, you’re going to have to have those small pieces connecting it. You could also go on to a word processing function on your computer, and most of them have a stencil style font that you could look at from there. I freehanded most of this, just because it’s kind of hard to trace or transfer, and that’s where the ruler comes in. It’s nice to kind of measure out each letter.
I’ve pre-traced here, and you’ll notice that my words are backwards. That’s also on purpose because when you flip it over, you’re not going to want your words to read in reverse. You’re going to want them to read normally. Then I added the little house on the end so that it filled out the space very nicely. I could have made the letters bigger, but what I did is I sketched out these letters with a pencil, and then I used the ruler to make sure that each line was straight. Because there is a grid on the back of this paper, it made it very easy to do that, and I just traced a heart over that general area.
Now, it’s ready for me to cut out. So you go ahead and take your X-ACTO knife. Be very careful, these are sharp. Make sure you’re on your cutting mat, and then go ahead and just cut the pieces out. You can see as I cut through, maybe it’s not perfect, but I can always go back and touch that up a little bit with my X-ACTO knife. Then, once it’s done, and you’ve cut everything out, this is your finished product. All you have to do is remove the back paper, and you can adhere it to any surface you’d like. This particular vinyl will stick to almost anything, although not everything. It might look good particularly on glass or say maybe the front of a refrigerator. Either way, you could also adhere it to a piece of foam core or mat board and put it into a frame and make a piece of wall art with it if you didn’t want to adhere it directly to a wall. That’s how you make a silhouette home state decal.