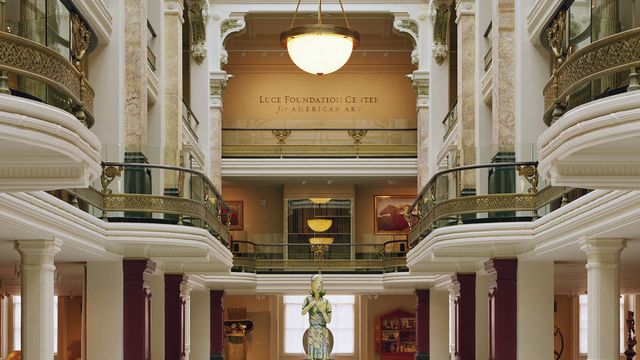
SAAM's Handi-hour is back on Thursday, July 23rd in the Luce Foundation Center for another fun evening of craft-making! Check out the video below with program coordinators Katie Crooks and Gloria Kenyon for a preview of this month's craft.
- Chapters
- descriptions off, selected
- captions off, selected
This is a modal window.
In our latest Handi-Hour crafting demonstration video, Katie Crooks is joined by the new Public Programs Coordinator, Gloria Kenyon, to demonstrate how to make the popular Pinterest marker mugs for the July 23 Handi-Hour at the Smithsonian American Art Museum.
GLORIA KENYON: Gloria Kenyon.
KC: And we both work at the Smithsonian American Art Museum and Renwick Gallery, and today I’m going to be showing Gloria how to do the next Handi-hour craft. Gloria has been so nice as to join me today because this is the last Handi-hour video that I will be doing for the museum as my last day at the museum is approaching, so Gloria thank you for stepping in and helping out.
GK: You’re quite welcome.
KC: The craft that we’re going to be doing today is a mug. You may have seen these all over Pinterest. They are ceramic mugs that you can see various reviews on them, whether they are “this didn’t work” or “this worked great,” and I went through the work of trying it out, testing various different methods for you so that you can follow these instructions and come up with a successful craft. Ready to get started?
GK: I am.
KC: Awesome. First, let me show you my mug that is my tester sample. It looks a little bizarre, but I’ve been using it and putting it through the dishwasher, so it’s going to give you a really good indication of what the different types of markers will do to a mug. I used four different types of markers, one being a glass marker made specifically for writing on glass, which worked but I found to be a little finicky for details. That’s what my name is written in here. I used sharpie markers, both regular colored and metallic, and so that’s where you see the stars and some of these spikes around side here. I also used BIC permanent markers to do some of the detailing of the words “so,” and then I used sharpie oil-based markers to do these little chains here, just the doodles and detailing. If you look at all three, my name and the little doodling here held up the best, and I found this to be the easiest to work with.
So, let’s go ahead and get started. The style that we’re going to be doing today is a kind of stencil and stippling style, and so this is the one that I made previously. I made a heart stencil with the letter W in the center, and I filled in solid the letter W. You might notice I have a little bit of smudging there; I haven’t baked this yet, so I can use a nail polish remover to touch that up if I need to before I put this in my oven at home, and then I used the markers around the outside of the stencil to create a stipple pattern, so it’s a W in a heart. Pretty simple, and I’m going to show Gloria how to do this with just her first initial, so let’s get started.
You’re going to need your mugs first and foremost. To make the stencils, and we’re not going to make those in this video, you can purchase them. You can also purchase stickers that are in letter shapes, which works really well and is an easy way to circumvent the stencil making portion or just grab some scratch paper, some masking tape. I have scissors for detailing as well as an X-ACTO knife to get any teeny tiny pieces you might want to pull out of your letter, a pencil, lots of scratch paper, and of course a variety of markers to work with. Gloria and I already have our stencils ready to go, and they’re on our mugs. So, K for Katie.
GK: G for Gloria.
KC: Yeah, and we’re all set to go. The one trick with sharpie markers or any type of oil-based marker, and you may have experienced this before at home if you’ve used them, is when you open them up and start them fresh and new, they’re going to be not workable. They won’t draw anything, so you need to push down on the marker a few times. That’s what gets the oil and paint inside flowing and mixing together, then you shake the marker, and it takes quite a bit of time on your first use to actually get the marker to start flowing and having it go through. Do this and every so often, open it up and look at it. I can already see the paint running onto the tip of the marker, and that’s where your scratch paper is going to come in handy and just kind of poke back and forth, and there we go, my marker is up and running and ready to go. Never shake it without the lid on, though. These are oil-based, and they will ruin your clothes.
I’m going to do similar to what I did with this mug and use a variety of colors to create a solid color where it’s most concentrated, but then you’ll see the colors separating out, and to do this you’ll need two or three colors. Gloria, what colors do you want to use?
GK: I think I’m going to go with the blue and the green.
KC: Awesome, I will do kind of a red and purple and see what happens there. It’s best to use complementary colors, colors that are close to each other on the color wheel. If we were to use red and green, you’d end up with…
GK: A Christmas mug.
KC: A Christmas mug and maybe a little bit of greyness towards the most concentrated areas. Okay, so shake up your marker with your lid on, and then we’ll test it here on the paper first. Awesome. So, what we’ve done with our stencils, and you can choose to do this any number of ways, but we basically printed our letters out on paper, and we used double-sided tape to get them stuck on the mug. I suggested an easy way to be very creative is to just use masking tape. Sketch your design on the masking tape, cut it out, and put the masking tape directly on the mug. It makes a really nice seal the whole way around, and so what you’re going to want to do is just basically create little dots, be very concentrated, very close to the edge of your letter, and then make them a little bit less concentrated as you go out. What you’ll do is do this with one color, and then stop for a little bit, give it a little time to air dry, and then switch to another color. Keep going back and forth so that the color nearest the edge of your letter is going to get very concentrated in kind of a mix, so around my K it will be a very purply red color, and Gloria will have a blue green, but then as you get further out to the edge you’ll end up seeing the separation of the dots, which will have a really cool effect – very similar to how this one here works.
While Gloria continues to work on her mug, I’m going to tell you the secret to baking these suckers so that your design stays on them. What you’re going to want to do is start with a cold oven. Don’t even turn it on. Place your mug or mugs on a cookie sheet or some sort of pan that is oven safe and put them in the middle of the oven. At that point turn the oven on to 450 degrees and allow the mugs to come up to that temperature, and then once it’s at 450 degrees you’re going to set the timer for 45 minutes. When the timer goes off, turn off your oven and allow the mugs to cool down slowly with your oven to room temperature. At that point in time when you take the mugs out of the oven, they will be cured and set to go.
Proof being that this mug I’ve been just using regularly and has gone through the dishwasher a few times already, and the oil-based markers here on the side have turned out just fine. Light scrubbing, hand washing has caused this part to already come off, and so it’s going to continue to fade over time. For the longevity of your mug, I do recommend hand washing, but it should be just fine through a standard dishwasher cycle.
Alright, how are we doing with your design?
GK: Pretty good. I still need to my inside, though.
KC: It’s looking good.
GK: I like the way the colors blend really well.
KC: I like that, too. Once she gets done, she’s going to want to let it sit and dry so that she doesn’t smudge what she’s done to it so far before she peels off her design. This is also another time when an X-ACTO knife is very handy. You can use it to easily get under the paper or the masking tape that you’ve been using to peel it off, which should work really well. Then Gloria can take this home and bake it, and she will have a custom monogrammed mug. All set to go. Good job.
GK: Thanks.
KC: Nice mug.
GK: It’s really fun.
KC: Thanks.
GK: Looking forward to Handi-hour.
KC: Awesome.
More Videos
The Art of Video Games exhibition is on view at the Smithsonian American Art Museum until September 30, 2012.
Nam June Paik: Global Visionary is on view at the Smithsonian American Art Museum from December 13, 2012 through August 11, 2013.
Explore the rise of untrained artists in the 20th century and discover their powerful personal journeys.
Join us in the Luce Center from 5:30 to 8 p.m. in the Smithsonian American Art Museum to design your own mug while enjoying selected craft beers. You can also sample teas and create your own tea blends with local restaurant and teahouse, Teaism, and while enjoying live music by Practically Einstein. Admission is $20 at the door and you must be 21 or older to enter.